Quick Links
BI Helper Website | Schedule Demo | Sign Up | Email: contact@bihelper.tech
What is BI Helper? Who uses it?
BI Helper automates the creation and distribution of user-specific PDF/ PPTX reports from Power BI. Over 200 businesses worldwide use BI Helper to routinely share actionable information with their customers, vendors and employees.
Business intelligence and reporting professionals value BI Helper's ease of use and automation capabilities, which significantly reduce workload, improve efficiency and allow them to focus on analysis and insights rather than repetitive reporting tasks.
How does BI Helper work?
BI Helper opens Power BI reports in read mode, applies slicers and filters to generate user-specific PDF/ PPTX files, then emails them to end-users.
BI Helper is integrated with Power BI and requires only one Power BI Pro ($14/mo) or PPU ($24/mo) license. It is browser-based and needs no servers, storage or IT infrastructure. End-users do not need Power BI licenses; only an email ID to receive their reports. For more information, see BI Helper FAQ.
Prerequisite: Create your Power BI report and publish it to a Power BI workspace. Then follow these steps:
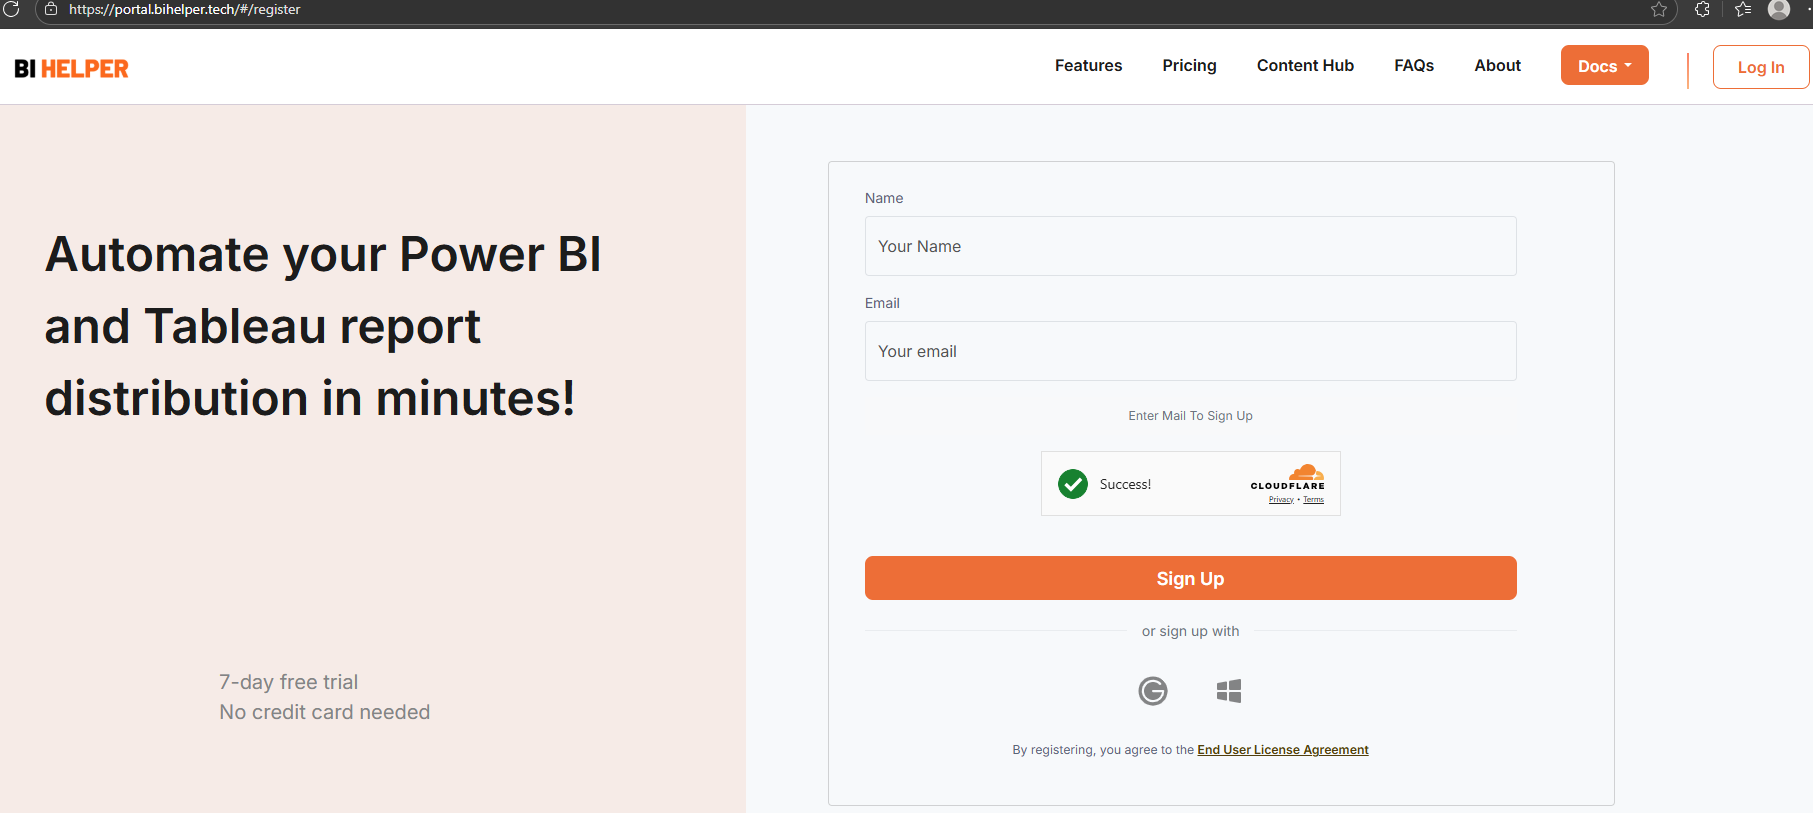
1. Create your BI Helper account here.
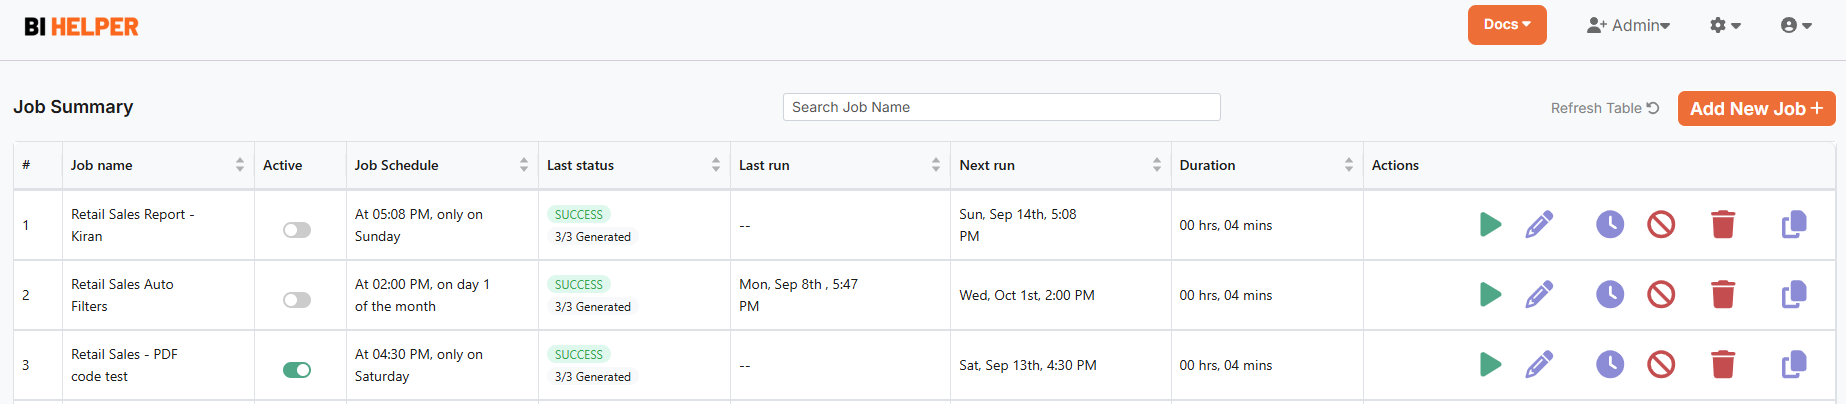
2. Once you sign in, BI Helper takes you to the Job Summary tab. Click on the Add New Job + button at the top right of the page.
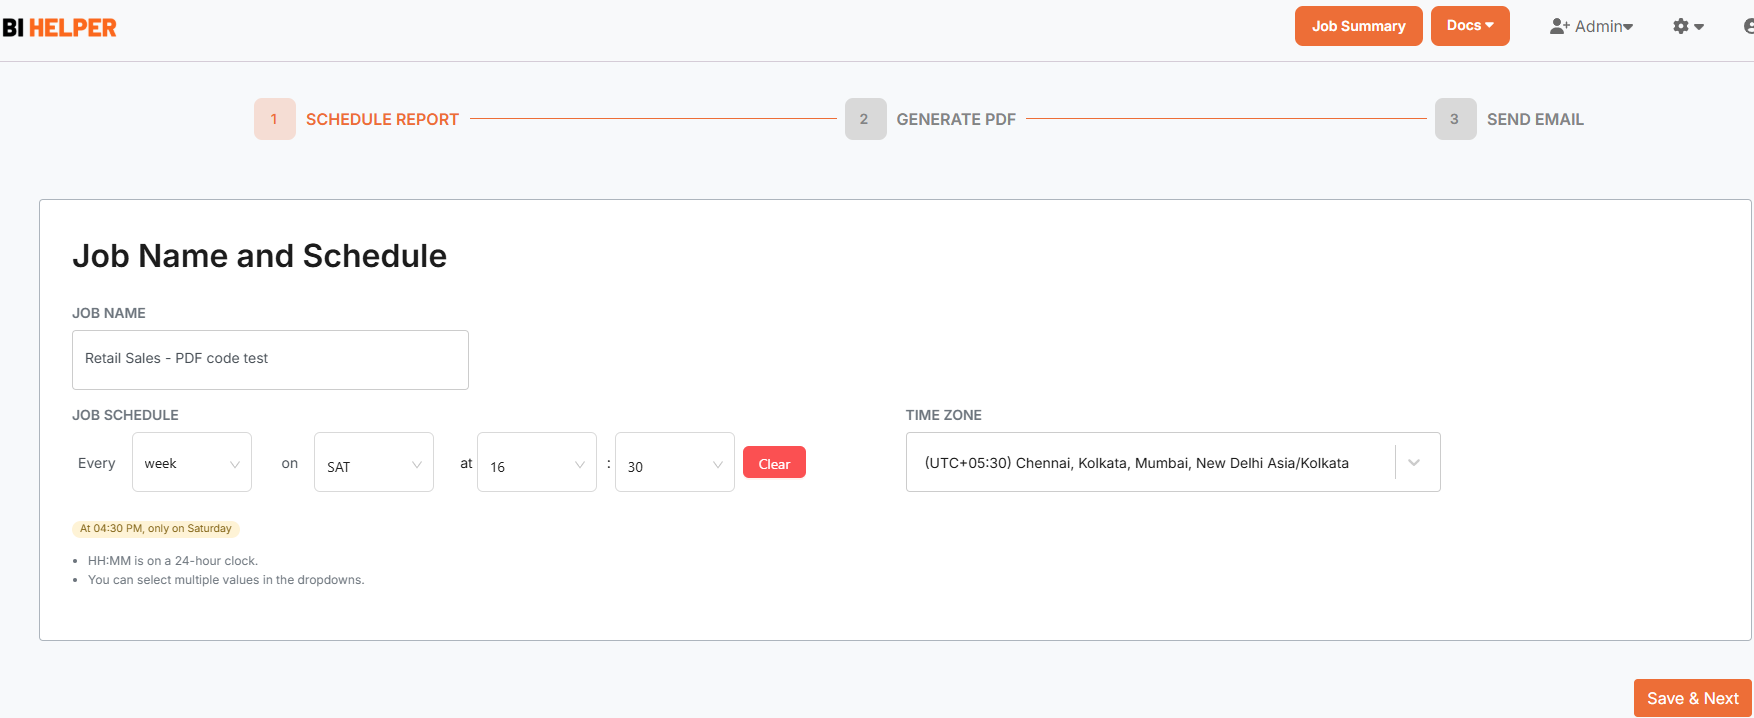
3. This takes you to the Schedule Report tab. Enter the job name and job schedule. Save and go to the Generate PDF tab.
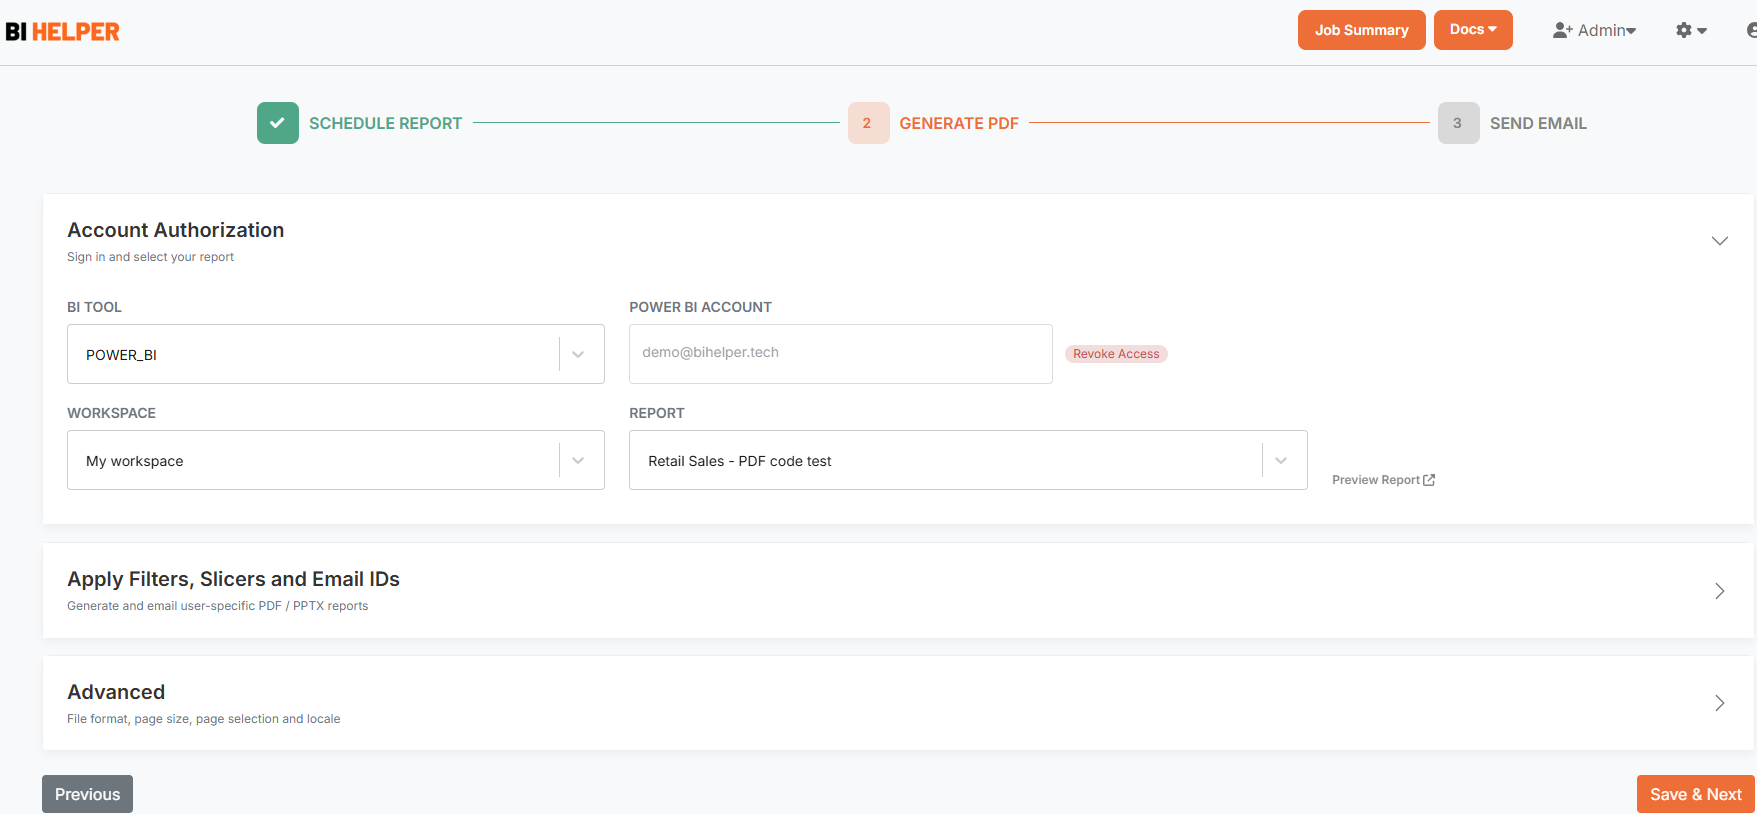
4. The Generate PDF tab has three sections.
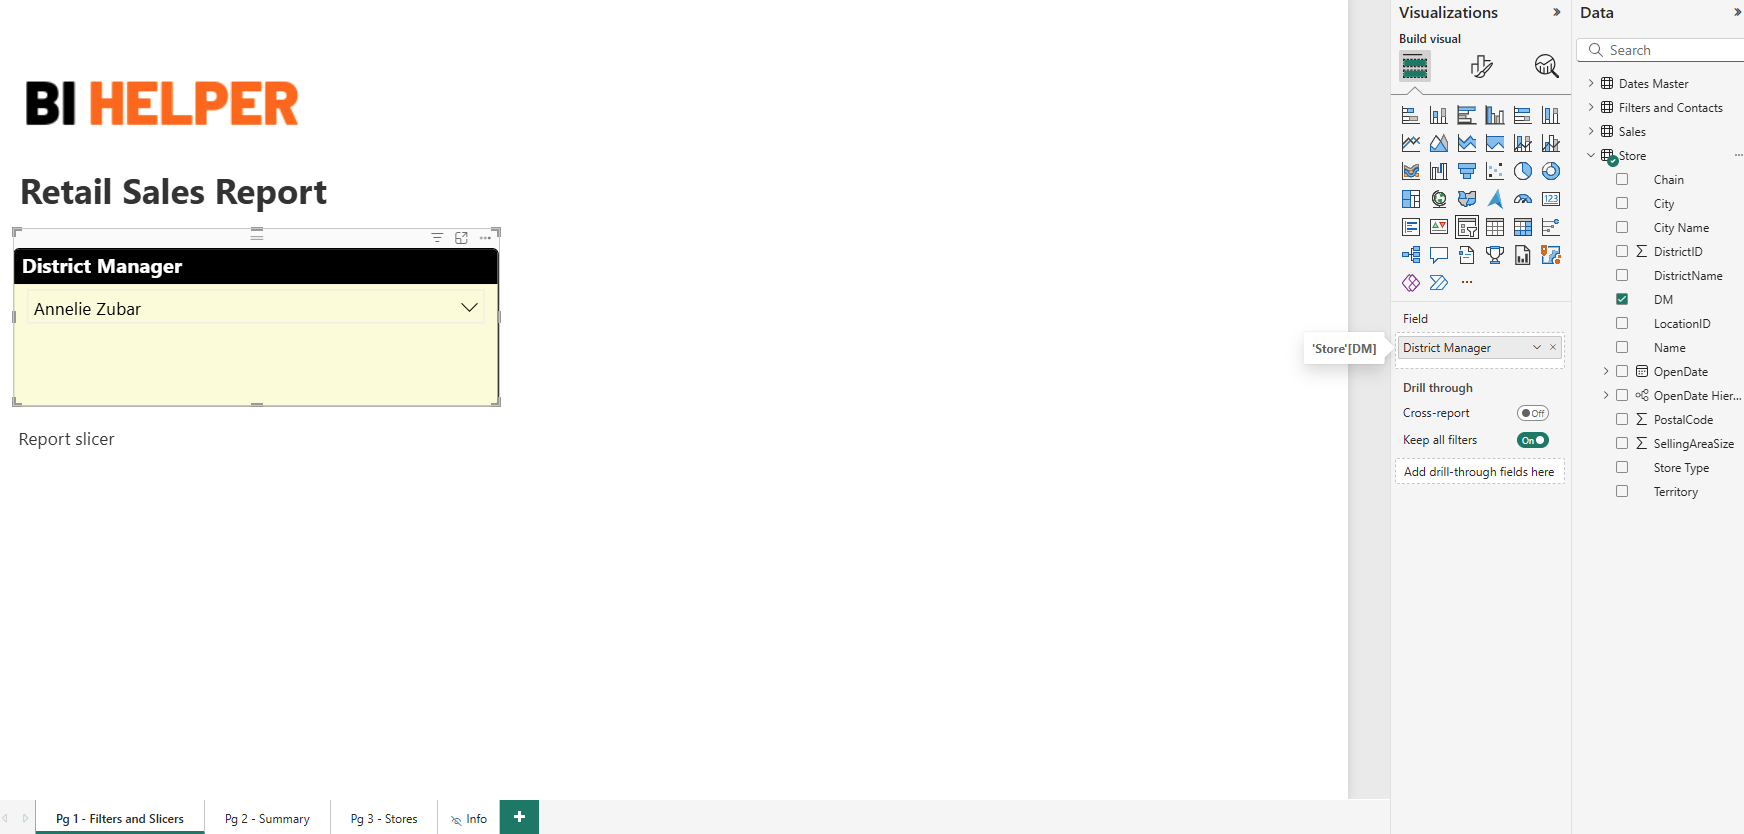
4 a. In the Account Authorization section, sign in to your Power BI account with your Microsoft credentials. Select the workspace and the report on which you want to generate PDF/ PPTX reports. Click on Preview Report to confirm that the selected Power BI report opens in BI Helper.
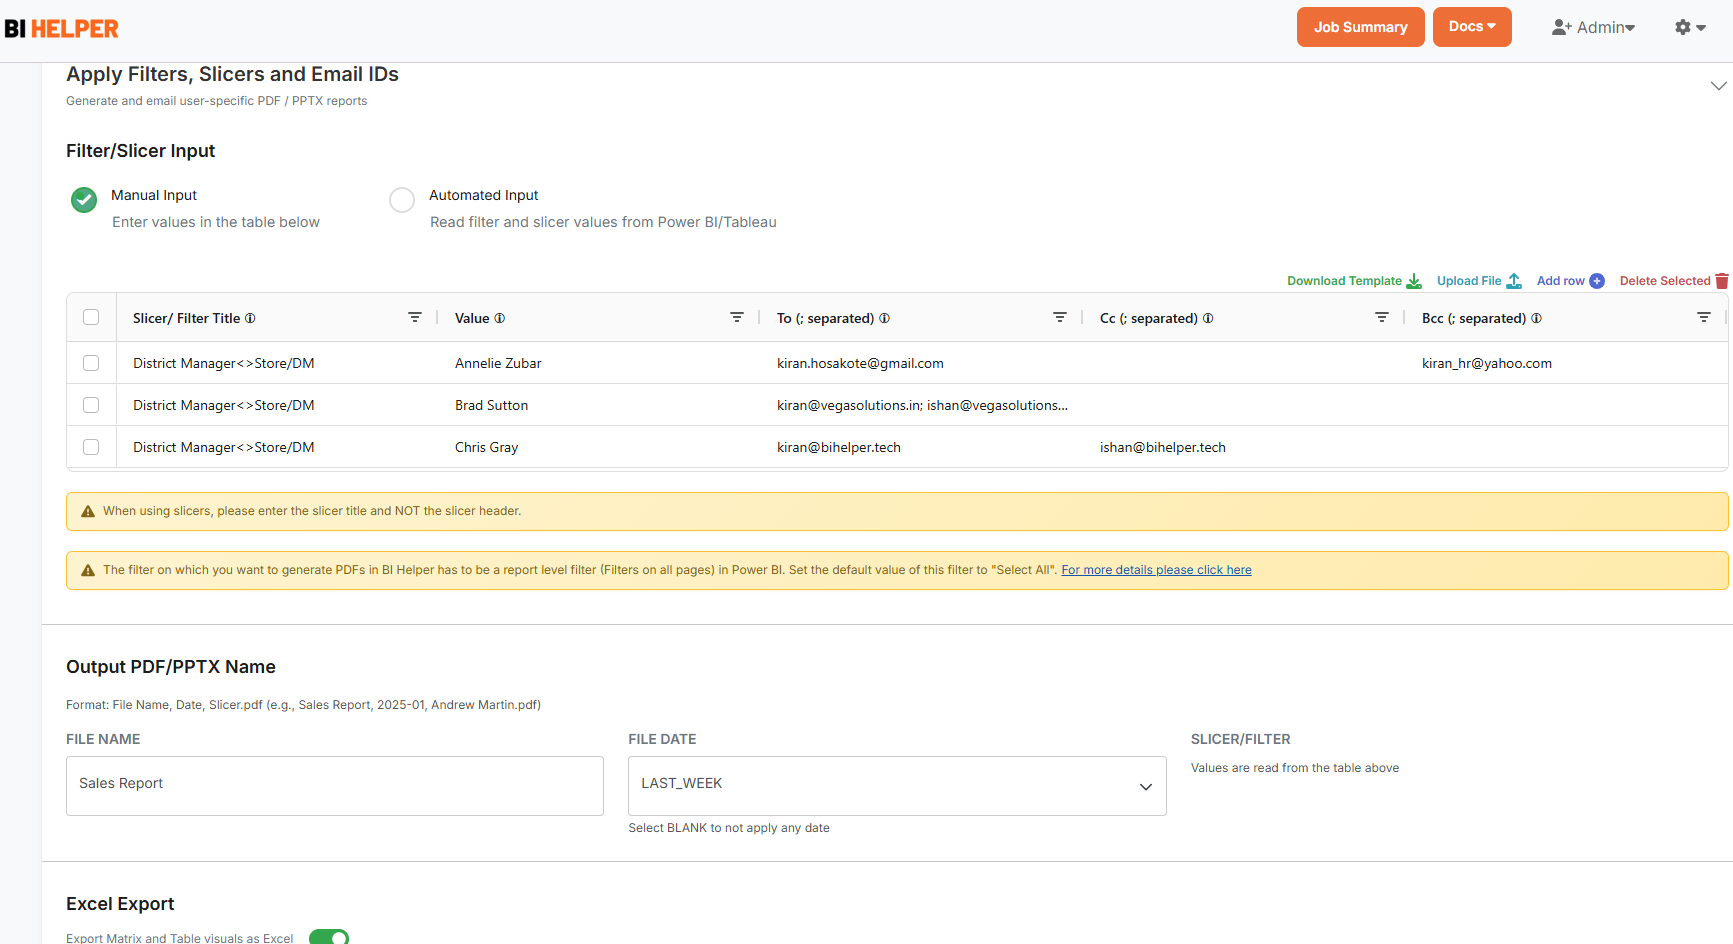
4 b. Next, go to the Apply Slicers, Filters and Email IDs section. Select the input mode - Manual or Automated.
In the Manual Input mode, enter the slicer/ filter details and recipient email IDs in the table based on the instructions in this tutorial. Or download the csv template at the top right of the table, enter the values and upload the file.
For the Automated Input mode for slicer/ filter and email input, refer to this tutorial.
To generate reports without filters or slicers, leave the Slicer/ Filter Title and Value columns blank.
Finally, enter the output PDF/ PPTX filename and the titles of the table and matrix visuals in your Power BI report which you want to export to Excel.
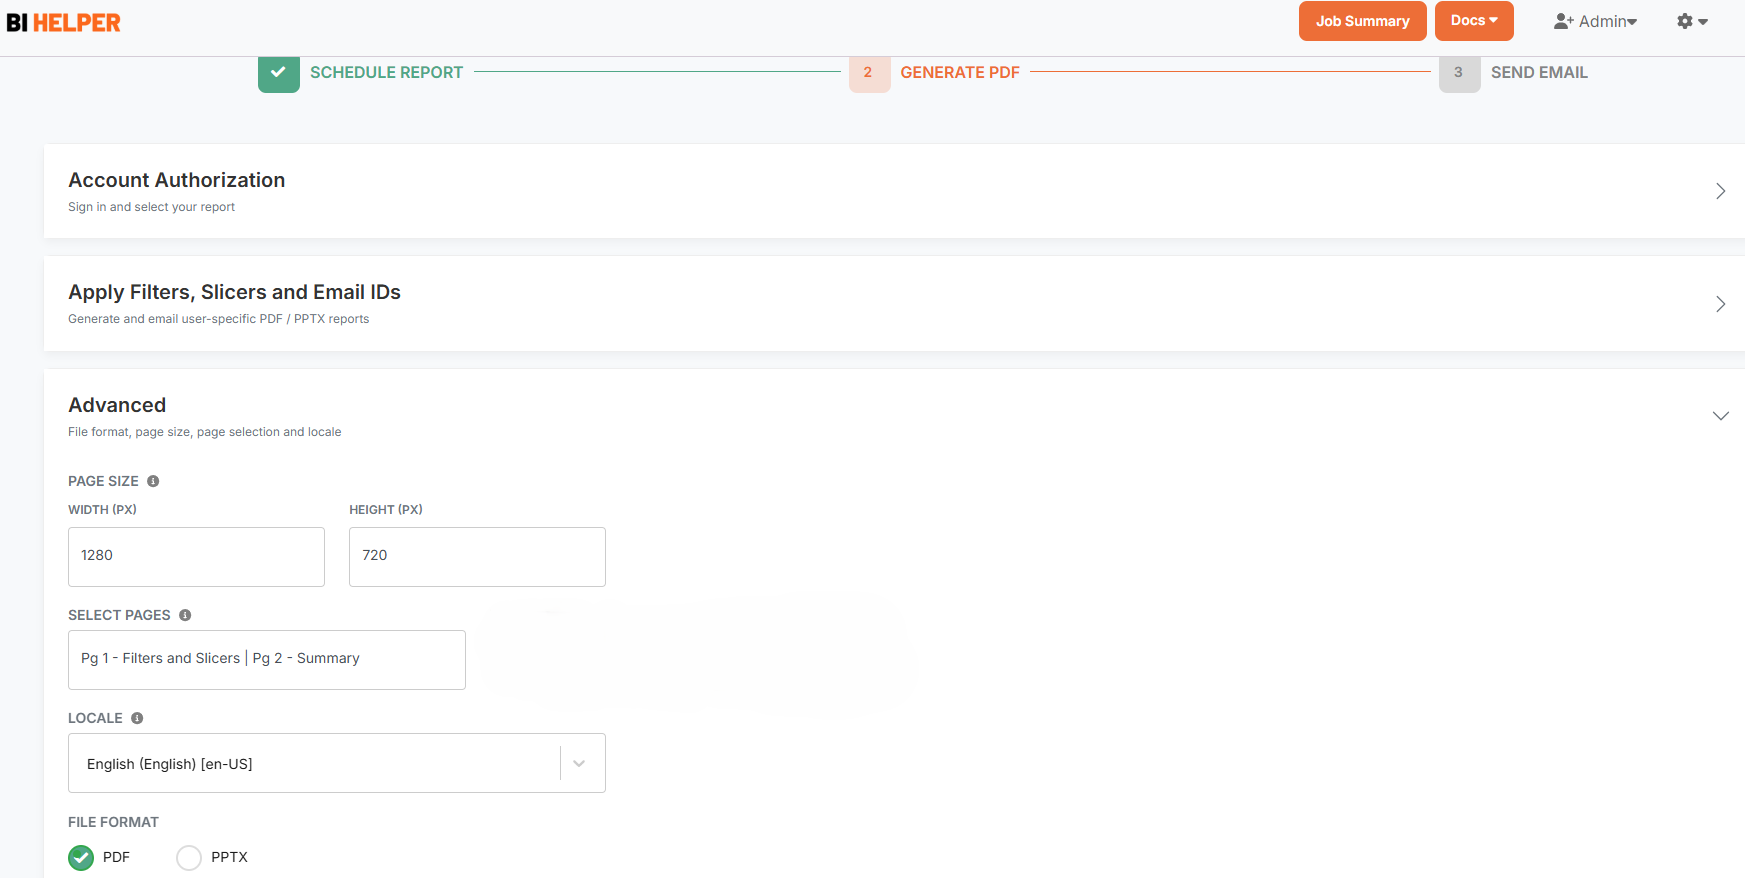
4c. Finally, go to the Advanced section of the Generate PDF tab to set up the output file format (PDF/ PPTX), page size and pages to print. Save and go to the Send Email tab.
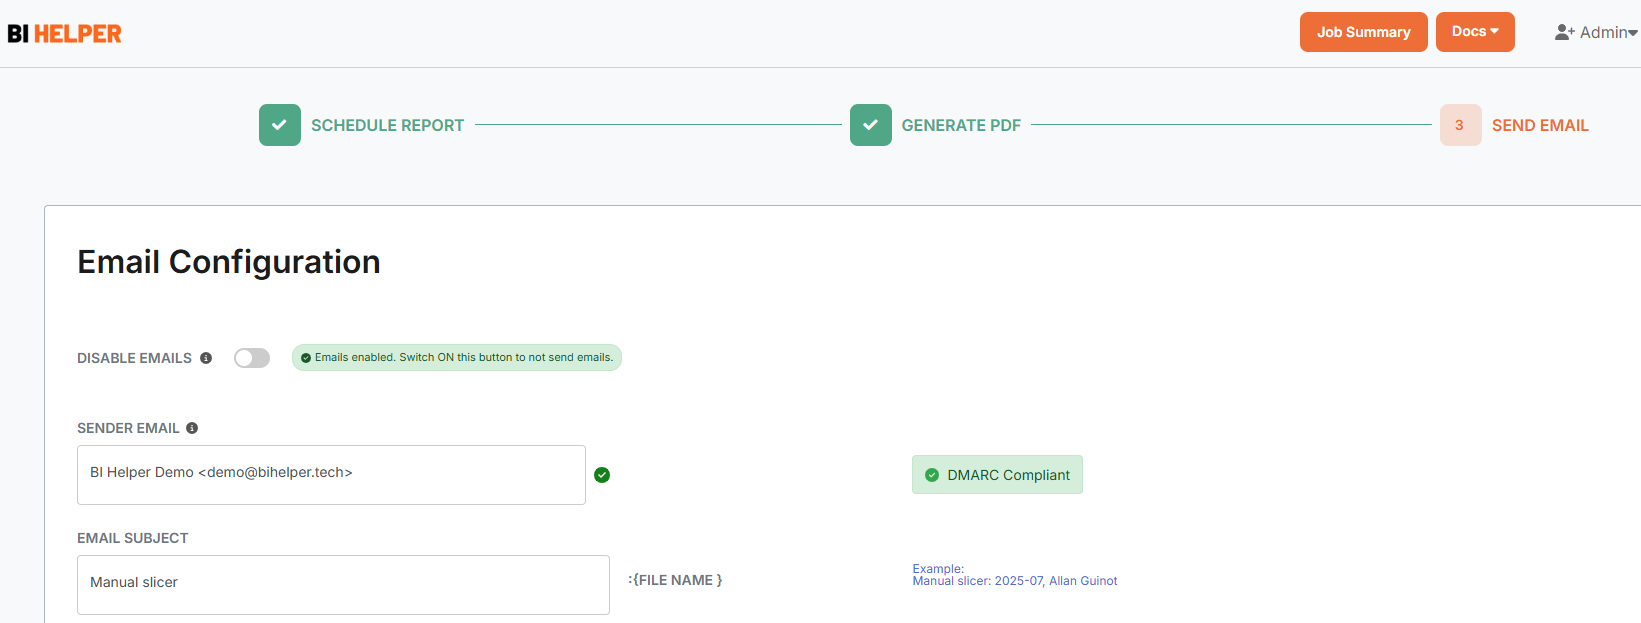
5. In the Send Email tab, set up and validate your sender mail ID and type in the email subject and body.
Note that you can either enable or disable email sending via the toggle button under the tab header.
Click on Finish to complete your job setup and return to the Job Summary tab.
IMPORTANT: To ensure that your emails are delivered without being classified as spam or being blocked by recipient firewalls, please make your sender email DMARC compliant. Please read Docs > Email Authentication for an overview of the process. Then go to Settings > DMARC Compliance to add a sending subdomain and make your sender email DMARC compliant.
In the Job Summary tab, click on the Play button to run your newly created BI Helper job. BI Helper will apply the entered slicer, filter and email values to create and send PDF/ PPTX reports to the recipients (To, Cc and Bcc) as email attachments.
Report recipients can be internal (employees, contractors) or external (customers, vendors) to your organization. They do not need Power BI licenses to receive their reports. All they need is an email ID to get their reports on time, every time!
Quick Links
BI Helper Website | Schedule Demo | Sign Up | Email: contact@bihelper.tech