How do I generate filtered, user-specific reports in Power BI and share them with my end-users?
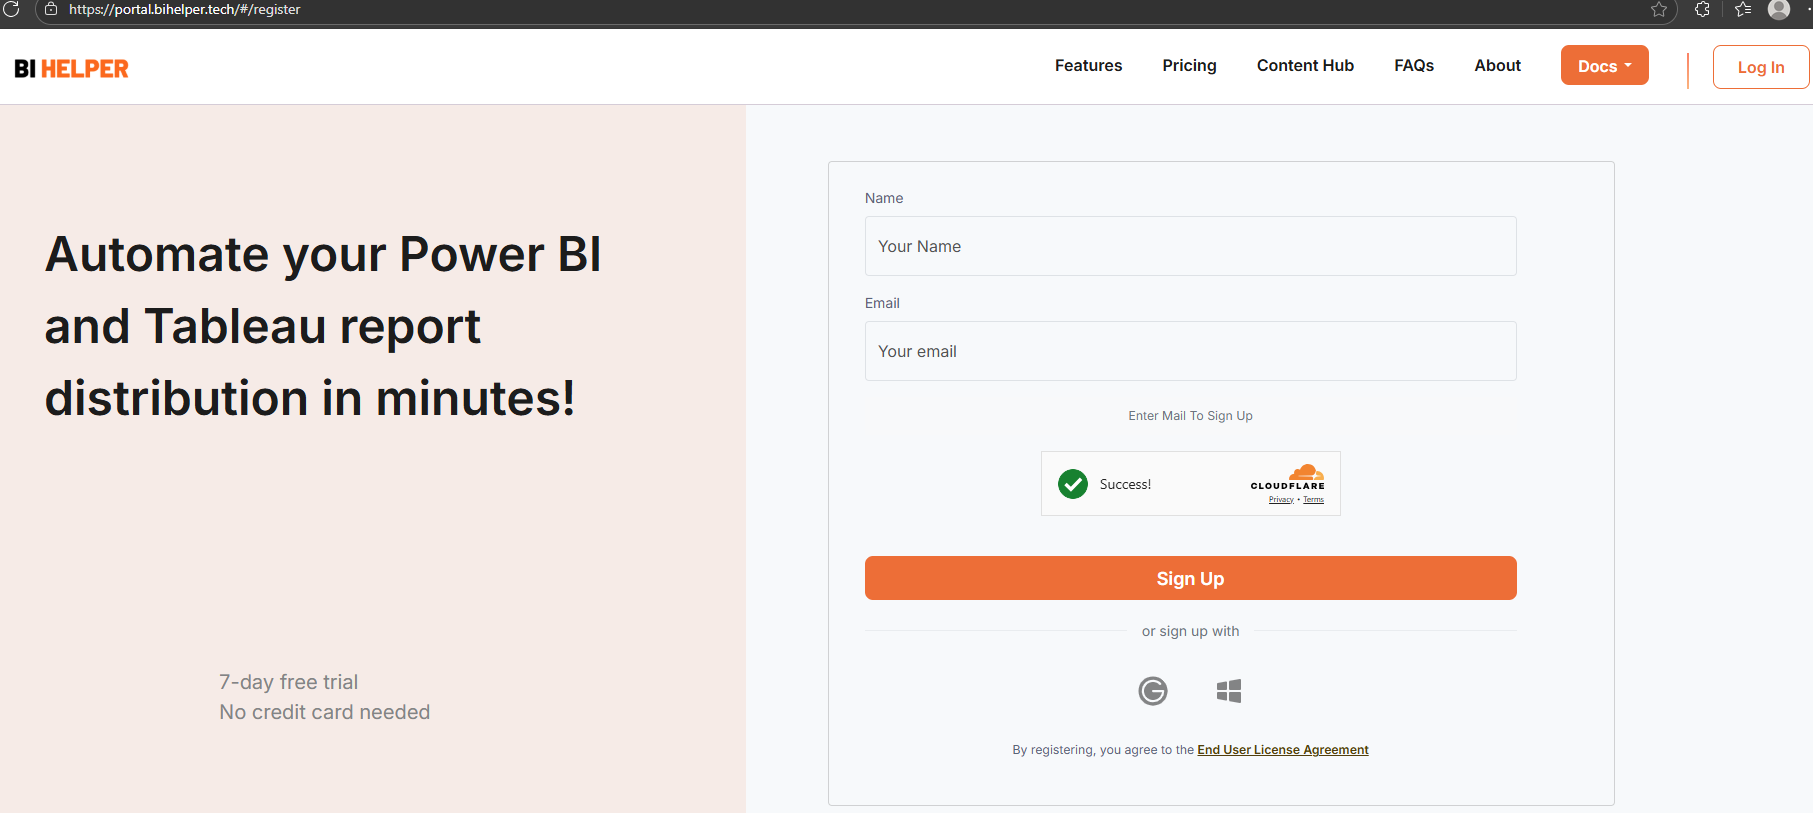
Create a BI Helper account and connect to Power BI Service. Select your Power BI report and set it up as a BI Helper job. Enter the filter/ slicer values and email IDs in BI Helper to create user-specific PDF/ PPTX reports, then email them to the defined end-users.
BI Helper supports both automated and manual input of filter/ slicer values and email IDs. This tutorial covers the automated input process, which is suitable for reports with medium to large PDF/ PPTX volumes. For low volume reports, see Manual Filter and Slicer Input in BI Helper.
How does the automated filter and slicer input mode work? Can it help with my Power BI report distribution?
In the automated filter and slicer input mode, BI Helper reads the latest filter/ slicer values and email IDs directly from Power BI. With a one-time job set up and no manual entry of values, BI Helper automatically creates and emails filtered, user-specific PDF/ PPTX reports as per the defined job schedule.
Automated input is a very popular feature - it is used by over 50% of all PDF/ PPTX reports generated in BI Helper.
This feature is included in the BI Helper Premium plan starting at $100 per month. It is a robust and cost-effective alternative to Power Automate + Power BI report distribution, which requires Power BI Premium capacity starting at $5,000 per month.
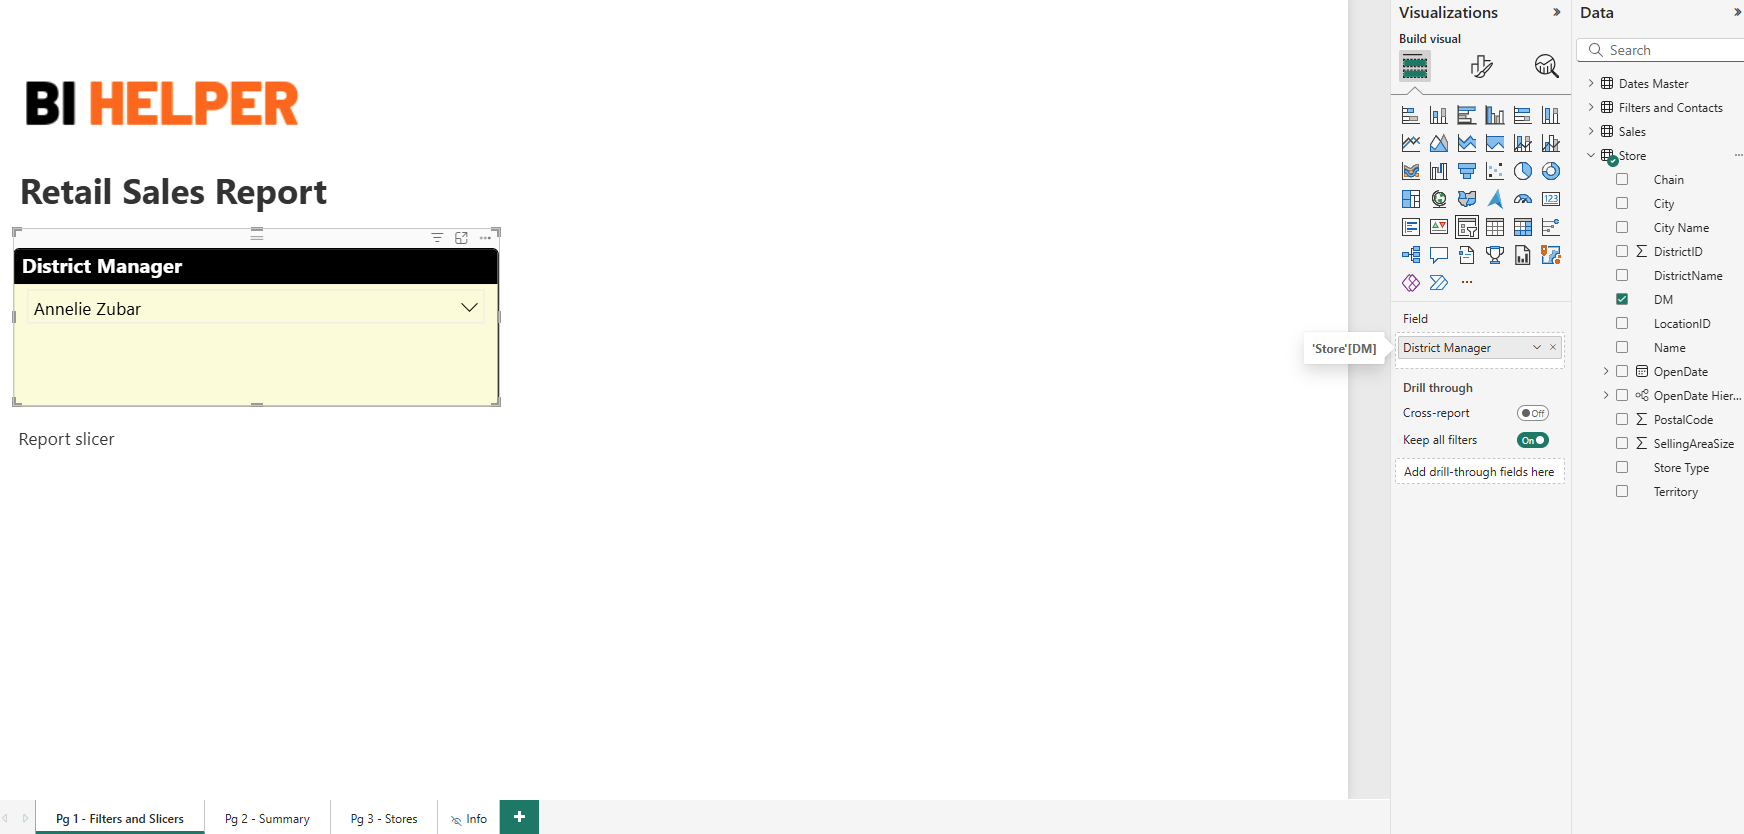
This tutorial explains how the automated filter and slicer input mode in BI Helper works. It uses the Retail Sales Report in Power BI as the BI Helper demo job. It filters the job on the slicer titled District Manager whose values are read from the DM column in the Store table.
Alternatively, it can filter the BI Helper job on a report level filter (Filters pane > filters on all pages).
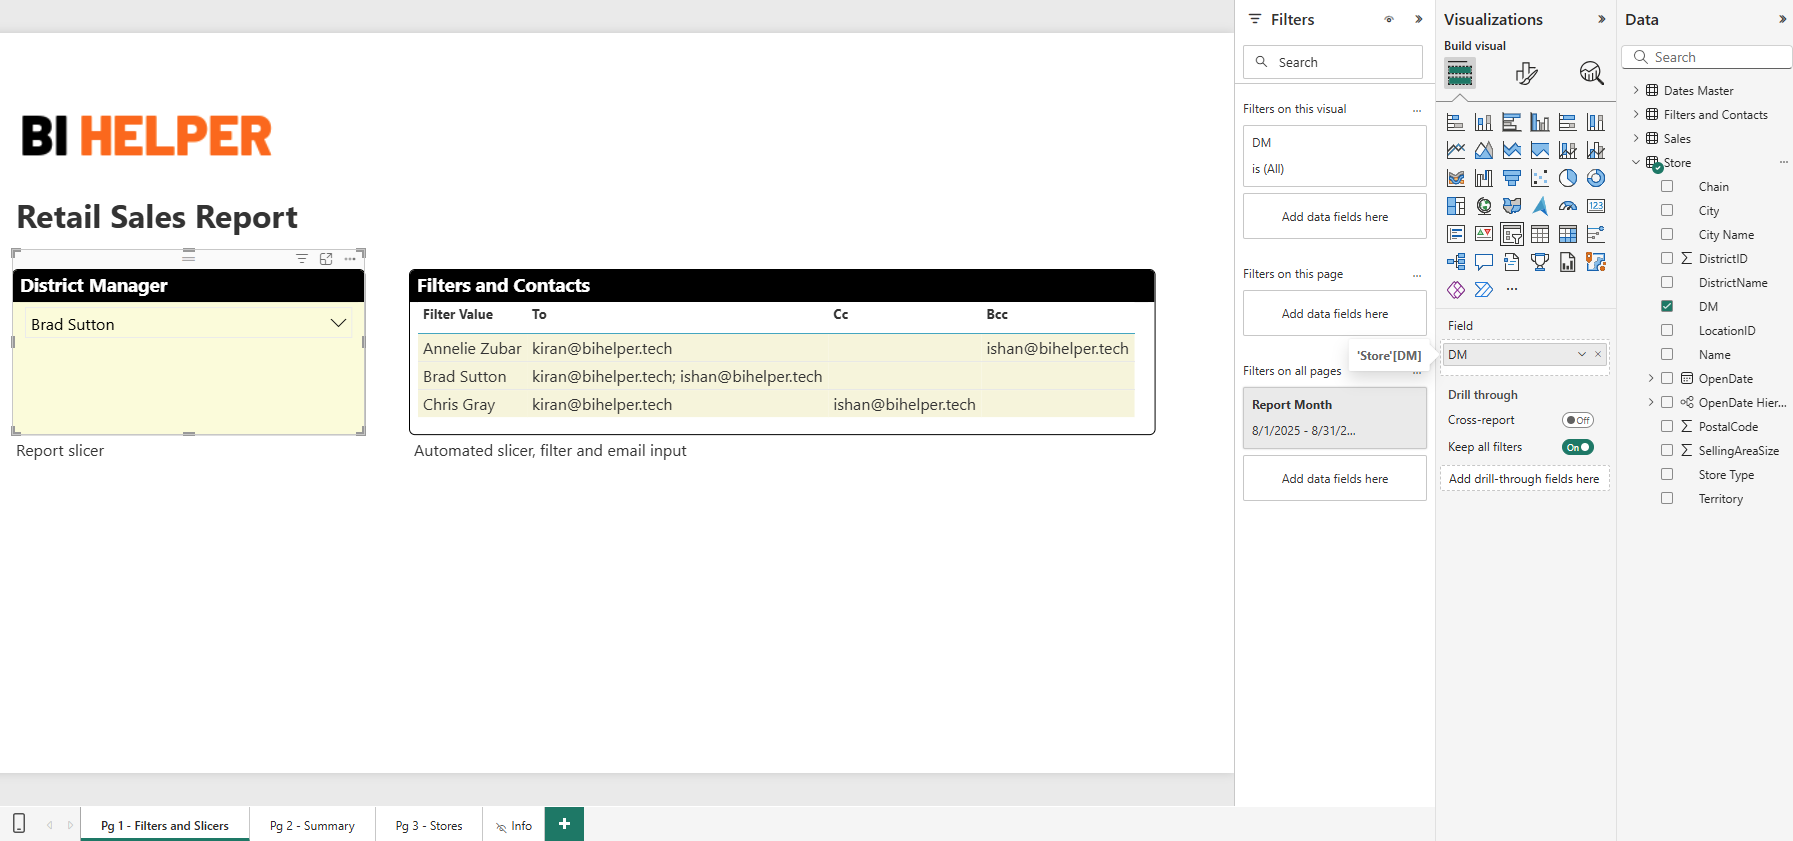
1. On the first page of your Power BI report (PBIX/ Desktop), create a table with four columns: Filter Value (filter and slicer values for which PDFs are to be generated), To, Cc and Bcc. This table provides the automated filter and slicer input to BI Helper.
2. In the example, the table is titled Filters and Contacts, but you can give it any other title in Power BI.
3. Use a semi-colon (;) to separate multiple email IDs in the To, Cc and Bcc columns.
4. The values in these columns are read from your Power BI report.
5. Publish your PBIX to Power BI Service and select it as your BI Helper job. Hide the Power BI page with the Filters and Contacts table so that it is not part of the output PDF/ PPTX reports in BI Helper.
1. Follow the steps in this tutorial to create a new BI Helper job.
2. Go to Generate PDF > Apply Filters, Slicers and Email IDs and select the Automated Input mode.
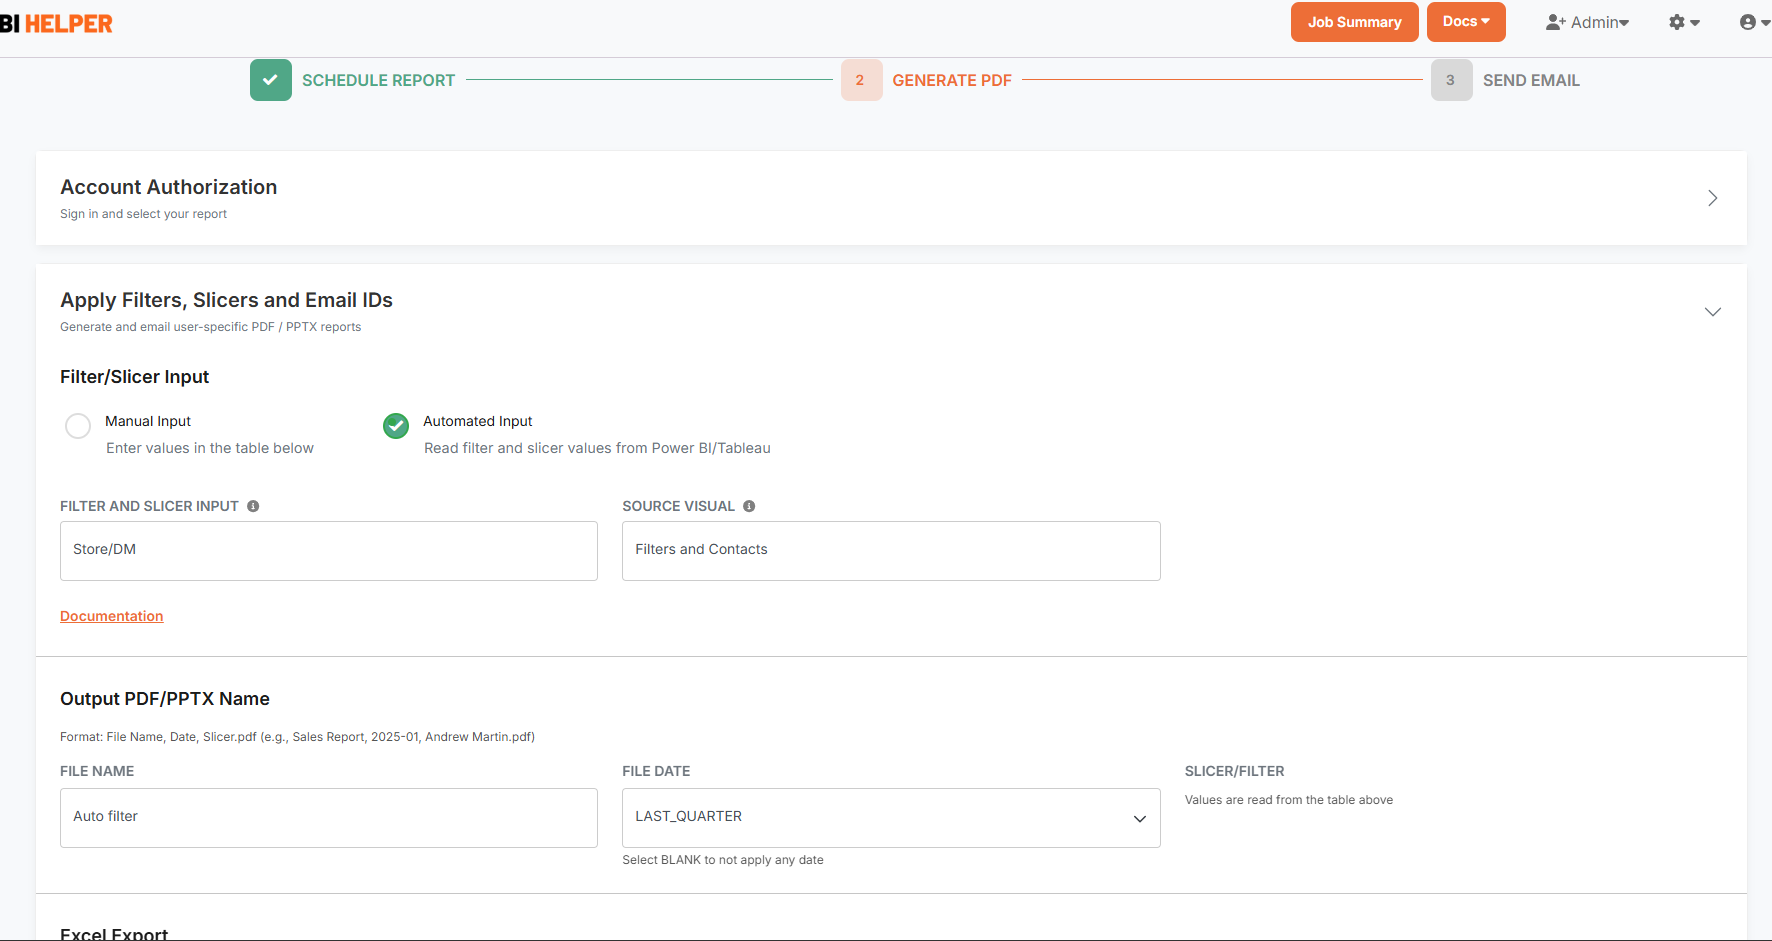
3. Specify the Filter and Slicer Input in the box. Follow this article for filter/ slicer syntax. For example, the District Manager Slicer in the Retail Sales Report is to be entered as District Manager<>Store/DM.
If you use a report level filter instead of a slicer, enter it as Store/DM.
4. Enter Filters and Contacts (the title of the table in the first page of your Power BI report) in the Source Visual box.
5. Name the output PDF/ PPTX, select the visuals for Excel export and Save this tab. Go to the Send Email tab and enter the email settings and body. Click on Finish to return to the Job Summary tab.
6. When you run this job, BI Helper downloads the filter/ slicer values from the Filters and Contacts table in Power BI. It then generates a PDF/ PPTX for each value and sends it to the To, Cc and Bcc email IDs.
Note: You can define multiple slicer and filter combinations in the first column of the Filters and Contacts table in BI Helper.